In a previous post, we learned how to convert Open Type fonts into True Type ones.
Now we'll learn how to store them in your system, so all text and graphics applications will find and use them.
Normally, you'll not un-/install fonts continuously on your system, so you would prefer (like me) a simple way, without the need to install additional software (like kfontview on KUbuntu, or the ones you can find for Windows).
On Ubuntu
All fonts can be stored in two locations:
- In ~/.fonts
Only you will see fonts copied here. You can copy fonts here with nautilus or from the shell:mkdir -p ~/.fonts # make sure folder exists
cp *.tff ~/.fonts # or whatever's the name of the fonts you want to copy
fc-cache -f -v ~/.fonts # reload the font cache to make new fonts visible - In /usr/share/fonts/truetype
All users will see fonts copied here. You can copy fonts here with nautilus or from the shell:mkdir -p /usr/share/fonts/truetype/myfonts # create a sub-folder to be organized
cp *.tff /usr/share/fonts/truetype/myfonts # or whatever's the name of the fonts you want to copy
fc-cache -f -v # reload the global font cache to make new fonts visible
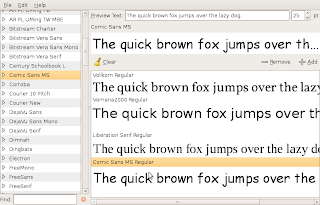
No extra software is needed. But even so, we'll mention a useful tool that doesn't come in your default Ubuntu installation: Specimen Font Previewer, a simple tool to view and compare fonts installed on your system.
You can install it from the Applications menu or from the shell:
sudo aptitude install gnome-specimen
Note: In a previous post, I explained how to install certain Microsoft fonts on your Ubuntu system.
On Windows
Fonts are installed in only one location: %WINDIR%\Fonts
Just open this location with the explorer and copy any font files here. They'll be immediately available for all users.
No comments:
Post a Comment