Picasa Photo Organizer


Picasa is a very powerful image manager.
It's main features are:
Organize

Organize
Manage your photos in one place, and find photos you forgot you had

edit

Edit
Eliminate scratches & blemishes, fix red-eye, crop and more

create

Create
Turn photos into collages, slideshows and more

share

Share
Upload seamlessly to Picasa Web Albums to share with friends, family & the world


Install instructions for Linux


Just copy and paste the following instructions into a Terminal (you'll have to do it twice, as the first sudo -v stops the rest of instructions):
sudo -v
# Add Google's public package signing key on your system to prevent warnings or errors
wget -q https://dl-ssl.google.com/linux/linux_signing_key.pub -O- | sudo apt-key add -
echo "deb http://dl.google.com/linux/deb/ stable non-free #Google repository" > /tmp/GooglePicasa.list
# If you don't want to install the beta testing version, don't paste the following line:
echo "deb http://dl.google.com/linux/deb/ testing non-free #Google testing repository" >> /tmp/GooglePicasa.list
sudo mv /tmp/GooglePicasa.list /etc/apt/sources.list.d/
sudo aptitude update
sudo aptitude install picasa

Firefox Window Border Fix

Today I had the same strange window border error as I had once with Thunderbird:

Suddenly, it started to miss its borders of the main window, being maximized always and didn't react on any changes like shrink, move, resize, maximize.
It covers the toolbar completely and when you open for example its addons window it doesn't show up, because it is hidden beneath the main window.

The fix is very similar:

  • Close Firefox

  • Edit by hand the file ~/.mozilla/firefox/xyz1234.default/localstore.rdf in your default profile directory.

  • Search the entry

    <RDF:Description RDF:about="chrome://browser/content/browser.xul#main-window"
    width="800"
    height="600"
    sizemode="normal"
    screenX="5"
    screenY="5" />

  • Change the width, height and screenXY entries to the ones you see here

  • Restart Firefox and it should have its borders again.

Access Subversion from Emacs


Emacs is a feature-rich text editor, with perhaps, more editing commands than any other editor or word processor


There exists lots of documentation in Internet about this great editor, for example the following links are very useful:


Integration with Subversion


There exist several plugins for the integration of Emacs with Subversion
, but the best one is Svn Status Mode. It's work is based on previous plugins, like vc-svn and dsvn.


Installation


You can get the very latest version with any of the following commands:


  1. sudo svn export http://svn.collab.net/repos/svn/trunk/contrib/client-side/emacs/psvn.el /usr/share/emacs/site-lisp/psvn.el

  2. sudo wget -O /usr/share/emacs/site-lisp/psvn.el http://www.xsteve.at/prg/emacs/psvn.el

  3. sudo wget -O /usr/share/emacs/site-lisp/psvn.el http://svn.collab.net/repos/svn/trunk/contrib/client-side/emacs/psvn.el


Add the following line to your ~/.emacs


(require 'psvn)


How to use


From now on, you find a new menu entry Tools-->SVN Status in the XEmacs.


  • You can also launch the command Alt-x svn-status directory .

  • It opens a new buffer *svn-status* where you can see all files controlled by Subversion, with flags that indicate there state.

  • Inside the XEmacs you have a menu which gives you access to all kind of commands for commiting and more, if not, just have a look at the mentioned Wiki or issue the command Ctrl-h m.

IOzone Filesystem Benchmark

IOzone Filesystem Benchmark
A very simple approach for measuring a hard disk throughput (at least reading is):
sudo hdparm -Tt /dev/sda

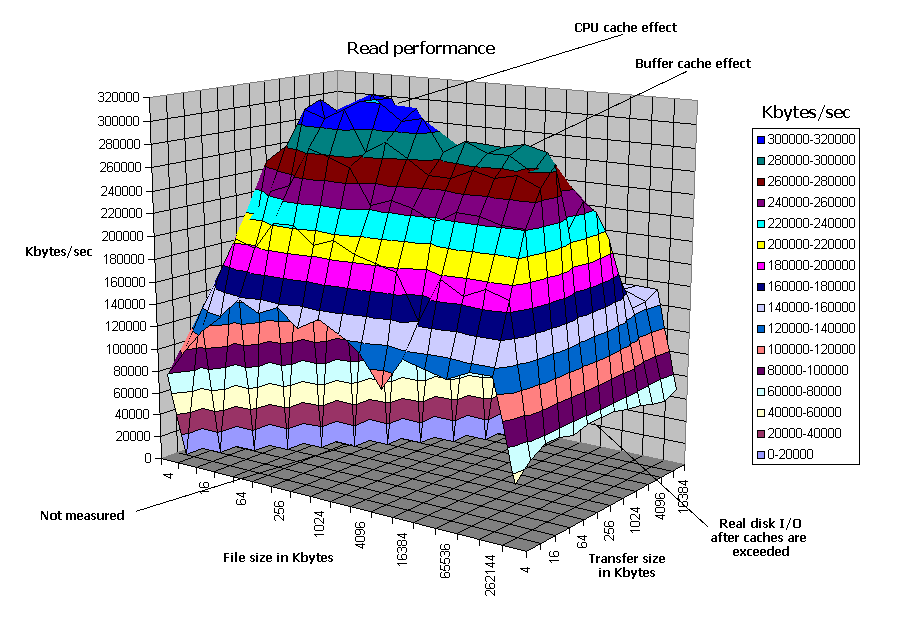
But for a more exhaustive measurement, taking in account tests like writing, random access etc. you could use IOzone, which is available for Linux and Windows.
It can generate Excel files which permits to create charts from the plain measurement numbers.

Example run


  1. Make sure you have some valid partition with a valid filesystem created on the disk to test. For example, on your third disk, the first partition is a XFS filesystem.

  2. Mount the partition and enter it as working directory:

    mkdir /tmp/test ; sudo mount /dev/sdc1 /tmp/test; cd /tmp/test

  3. Now run the IOzone test (we put a small maximum limit to get results quickly):

    sudo iozone -Ra -g 6M -b /tmp/Results.wks

  4. Finally, unmount the partition:
    cd /tmp ; sudo umount /tmp/test